menu

Complete Roof Inspection Checklist for Baltimore Homeowners – Catch Problems Before They Cost Thousands

Get the Same Professional Roof Assessment Form Maryland Contractors Use to Evaluate Structural Integrity, Spot Water Intrusion Early, and Plan Maintenance Before Minor Issues Become Major Expenses

Slider Image 1
Slider Image 2
Slider Image 3
Slider Image 4
Slider Image 5
Slider Image 7
Slider Image 8
Slider Image 9
Slider Image 10
Slider Image 11

Why Baltimore Roofs Fail Without Regular Inspections

Baltimore's Chesapeake Bay humidity and freeze-thaw cycles create a hostile environment for roof systems. Water vapor rises from the Inner Harbor and Patapsco River, condensing in attics and saturating shingle underlayment. When temperatures drop below freezing, that trapped moisture expands and contracts the roof deck, cracking sealant bonds and lifting shingles along the edges.

Most homeowners in neighborhoods like Federal Hill and Canton only climb up to check their roof after a leak appears inside. By then, water has already compromised the decking, insulation, and possibly the ceiling joists. A residential roof inspection guide helps you catch the warning signs early, when repairs cost hundreds instead of thousands.

Without a structured roof maintenance checklist, you miss the subtle indicators. A few missing granules on asphalt shingles signal UV degradation. Curled edges mean the adhesive strip has failed. Rust spots on flashing indicate galvanic corrosion from dissimilar metals. These problems accelerate quickly in Baltimore's humid climate, where algae and moss growth trap moisture against the roofing material.

A proper roof assessment form documents these conditions methodically, creating a timeline of deterioration. You can track how quickly problems develop and schedule preventive repairs before emergency tarping becomes necessary. This documentation also proves invaluable when filing insurance claims after storms roll through from the Atlantic, giving adjusters clear evidence of pre-existing conditions versus new damage.

Why Baltimore Roofs Fail Without Regular Inspections
The Seven-Point Roof Check Sheet Professionals Use

The Seven-Point Roof Check Sheet Professionals Use

A professional roofing inspection template divides the roof into distinct zones, each requiring specific examination techniques. The checklist begins with the roof perimeter, where wind-driven rain penetrates most frequently. Inspect all rake edges and eaves for lifted shingles, missing drip edge, or damaged fascia boards that expose the roof deck to water infiltration.

Next, evaluate all penetrations. This includes plumbing vents, exhaust fans, satellite mounts, and chimney flashings. Check the sealant bead around each penetration for cracks or shrinkage. Examine step flashing where the roof meets vertical walls, looking for rust stains or separation from the siding. These junction points fail first in Baltimore's humidity because they experience the most thermal expansion and contraction.

The valley inspection comes third. Water concentrates in valleys at high velocity, stripping away granules and wearing through shingles faster than flat sections. Look for exposed underlayment, missing valley flashing, or accumulated debris that dams water flow. Many older Baltimore rowhomes have metal valleys that corrode through after 20 years.

Inspect the field of the roof for uniformity. Walk a grid pattern, noting any variations in shingle color, texture, or alignment. Soft spots indicate decking rot underneath. Blistering suggests trapped moisture in the shingle mat. Document the condition of all ridge vents, checking for animal entry points or separated end caps.

The final step examines the attic interior. Proper ventilation prevents moisture accumulation that rots the deck from below. Check for water stains on the underside of the roof sheathing, inadequate insulation, or blocked soffit vents that restrict airflow.

How to Complete Your Roof Inspection in Three Phases

Complete Roof Inspection Checklist for Baltimore Homeowners – Catch Problems Before They Cost Thousands
01

Ground-Level Visual Survey

Start with binoculars from the street. Examine the roof plane for sagging sections, missing shingles, or visible granule loss. Check gutters for shingle granules, which indicate advanced wear. Look at the chimney from multiple angles to spot leaning or separated flashing. This ground survey identifies major problems before you risk climbing, and helps you focus your roof-level inspection on specific problem areas that need closer examination.
02

Close Physical Assessment

Using proper fall protection, access the roof to perform tactile inspections. Press on shingles to test adhesion. Run your hand along flashing joints to feel for separation. Use a moisture meter on suspected soft spots. Check all fasteners for rust or backing out. Photograph every defect with a reference object for scale. This hands-on assessment captures problems invisible from the ground, like granule loss on north-facing slopes or failed sealant that hasn't yet caused leaks.
03

Documentation and Action Planning

Transfer your findings to a roof assessment form that categorizes issues by severity. Rate each problem as immediate, short-term, or long-term concern. Attach photos to each line item. Create a repair timeline based on risk and budget. Share this documentation with contractors to get accurate bids. Update the checklist every six months to track how quickly problems progress. This systematic approach transforms random observations into actionable maintenance data.

Why Baltimore Property Owners Trust Local Roof Inspection Expertise

Baltimore's building codes require specific wind uplift ratings due to coastal storm exposure. A roof inspection checklist created for Denver or Phoenix won't address the hurricane strap requirements in Maryland residential code. Local roofers understand which shingle weights meet Baltimore County's wind zone specifications and which underlayment grades resist the humidity that rolls off the Chesapeake.

Neighborhoods like Mount Vernon feature historic rowhomes with shared party walls and complex flashing details. These attached structures require specialized knowledge of how water migrates between units. A generic roof check sheet misses the critical inspection points where two roofs meet, leading to disputes between neighbors when leaks cross property lines.

A Plus Roofing Baltimore has evaluated thousands of local roof systems. We recognize the specific failure patterns that develop on Baltimore's architectural styles. We know that many Hampden rowhouses still have original slate roofs from the 1920s, requiring different assessment criteria than modern composition shingles. Our roof maintenance checklist accounts for these variations, ensuring you get relevant data about your specific roof type.

We also understand local contractor behavior. Some out-of-state storm chasers use scare tactics after every weather event, claiming total replacement is necessary when repairs would suffice. Our residential roof inspection guide helps you verify whether damage is cosmetic or structural, protecting you from unnecessary expenditures.

The roofing inspection template we provide follows the same format insurance adjusters use. When you file a claim, having your own documented pre-storm condition gives you negotiating power. Adjusters respect homeowners who present organized evidence rather than vague complaints about leaks.

What Your Roof Inspection Process Should Include

Inspection Frequency and Timing

Complete a full roof assessment twice annually, in spring after ice damage potential ends and fall before winter weather arrives. Schedule additional inspections after any storm with winds exceeding 50 mph or hail larger than one inch. Baltimore's spring storms often include high winds that lift shingles without leaving obvious damage. Fall inspections catch summer heat damage before winter moisture exploits weakened areas. Document each inspection with photos and dates to establish a maintenance history that proves proper care to insurance companies.

Essential Tools and Safety Equipment

A proper roof inspection requires more than a ladder. Use a roof harness anchored to a structural element, not a vent pipe. Bring a moisture meter to detect hidden leaks, binoculars for distance viewing, a camera with macro capability for close-up damage documentation, and a tape measure for recording damage dimensions. Wear rubber-soled shoes with good traction. Never inspect during wet conditions or high winds. Keep a notepad or tablet to record observations immediately, matching photos to written descriptions for later reference when creating repair estimates.

Red Flags That Require Immediate Action

Some roof problems demand emergency response, not scheduled repair. Exposed roof decking means water is entering the structure now, not later. Sagging sections indicate structural failure underneath. Multiple shingles missing in one area create a direct water entry point. Large sections of lifted or curled shingles will tear off in the next windstorm. Separated flashing around chimneys or walls allows water to run directly into the building envelope. If your inspection reveals any of these conditions, contact a licensed contractor immediately for temporary protection and damage assessment.

Long-Term Maintenance Planning

Use your roof assessment form to predict replacement timing and budget accordingly. Asphalt shingles typically last 15 to 20 years in Baltimore's climate, but south-facing slopes degrade faster due to UV exposure. Track granule loss, shingle brittleness, and curling progression. When 20 percent of your roof shows advanced wear, start planning for replacement within 24 months. This proactive approach lets you schedule work during contractor off-seasons when pricing is competitive, rather than scrambling for emergency service after a failure. Maintain digital copies of all inspection records to transfer to future owners.

Frequently Asked Questions

You Have Questions,
We Have Answers

What to look for on a roof inspection? +

A roof inspector checks shingles for curling, cracking, or missing granules caused by Baltimore's freeze-thaw cycles. They examine flashing around chimneys and vents for gaps or rust. Gutters get inspected for clogs and drainage issues common in our humid climate. The inspector looks for sagging, soft spots, or moss growth indicating water damage. They check attic ventilation and insulation, which combat moisture buildup during Maryland's muggy summers. Penetrations like skylights and pipe boots get scrutinized for seal integrity. Finally, they assess overall structural integrity and document any storm damage from wind or hail.

What are the 4 types of inspections? +

The four main inspection types are visual inspections, where contractors examine your roof from ground level or ladders. Physical inspections involve walking the roof to check material condition and identify hidden damage. Infrared inspections use thermal imaging to detect moisture trapped beneath shingles, useful in Baltimore's high-humidity environment. Drone inspections capture aerial footage of hard-to-reach areas on steep or tall roofs without safety risks. Each type serves different purposes. Visual inspections work for routine maintenance, while physical inspections are thorough for older roofs. Infrared and drone technology help diagnose problems traditional methods might miss.

What are the red flags for roofing contractors? +

Watch for contractors demanding large upfront payments before starting work. Legitimate Baltimore roofers require reasonable deposits, not full payment. Avoid anyone who shows up unsolicited after storms offering immediate repairs. Missing proper licensing or reluctance to provide references signals trouble. Pressure tactics like limited-time discounts or scare tactics about immediate roof failure are warnings. Contractors without local addresses or those using out-of-state plates may disappear after taking your money. Vague contracts lacking specific materials, timelines, or warranty details protect them, not you. If they discourage insurance involvement or offer to waive deductibles, walk away.

What are 5 very important things that are inspected in a home inspection? +

Home inspectors prioritize the roof, checking for leaks, missing shingles, and remaining lifespan. Foundation issues get scrutinized because Baltimore's clay soil causes shifting and settlement cracks. Electrical systems must meet code, especially in older row homes with outdated wiring. Plumbing gets tested for leaks, water pressure, and proper drainage. HVAC systems are evaluated for functionality and efficiency, critical during Maryland's humid summers and cold winters. These five components represent the most expensive potential repairs. Identifying problems early helps buyers negotiate or avoid costly surprises after closing on Baltimore properties.

What is the biggest red flag in a home inspection? +

Foundation cracks and water intrusion represent the biggest red flag. In Baltimore, clay soil expansion and contraction create structural movement that cracks foundations. Water follows these cracks into basements, causing mold, rot, and compromised structural integrity. This problem escalates quickly in our humid climate and costs thousands to remediate properly. Unlike cosmetic issues or minor repairs, foundation damage affects your home's safety and resale value. If an inspector flags foundation concerns, hire a structural engineer immediately. Sellers may hide previous water damage with fresh paint or dehumidifiers during showings, making professional inspection critical.

How long does a roof inspection usually take? +

A standard roof inspection takes 45 minutes to two hours depending on roof size, pitch, and complexity. Baltimore row homes with simpler rooflines take less time than large colonials with multiple valleys and dormers. Steep pitches slow inspectors down for safety. Older roofs require more time to document deterioration and evaluate remaining lifespan. If the inspector finds damage, they spend additional time photographing and measuring affected areas for estimates. Infrared or drone inspections add 30 minutes. Weather delays happen during rain or high winds. Always allow buffer time rather than scheduling back-to-back appointments.

What are the 7 steps of the inspection process? +

Step one involves reviewing roof history and identifying concerns. Step two is the exterior visual assessment from ground level. Step three requires climbing up to physically walk the roof surface. Step four examines flashing, penetrations, and vulnerable transition points. Step five inspects gutters, downspouts, and drainage systems. Step six includes attic inspection for leaks, ventilation, and insulation quality. Step seven involves documenting findings with photos and preparing a detailed report with recommendations. Baltimore inspectors pay extra attention to storm damage and humidity-related deterioration during these steps. This systematic approach ensures nothing gets overlooked.

What is an inspection checklist? +

An inspection checklist is a standardized document listing all roof components that require examination. It ensures inspectors evaluate shingles, flashing, gutters, ventilation, structural elements, and penetrations systematically. Checklists prevent missed areas and create consistency across inspections. For Baltimore properties, good checklists include climate-specific items like moss growth, ice dam damage, and humidity-related deterioration. The checklist becomes part of your inspection report, showing what was examined and its condition. Homeowners can use checklists for DIY maintenance between professional inspections. Contractors use them to document pre-existing conditions before starting repairs.

What is a 7 point inspection? +

A seven-point inspection is not standard roofing terminology. You may be thinking of vehicle inspections or general home walkthroughs. For roofs, inspectors follow comprehensive checklists covering more than seven items. They examine structural integrity, shingle condition, flashing, gutters, ventilation, penetrations, and interior signs of leaks. Baltimore roofing inspections adapt to local challenges like freeze-thaw damage and storm impact. If a contractor mentions a seven-point inspection, ask specifically what they evaluate. Reputable inspectors provide detailed checklists showing every component they examine, not arbitrary point systems that might skip critical areas.

How to tell if a roofer is lying? +

A dishonest roofer claims your entire roof needs replacement when only repairs are necessary. They rush you into decisions without providing written estimates or detailed explanations. Watch for inconsistent answers about materials, timelines, or warranties. Legitimate contractors explain problems clearly and show you damage directly. Liars avoid documenting issues with photos or discourage second opinions. They may exaggerate storm damage to inflate insurance claims. In Baltimore, scammers target older neighborhoods after weather events. Always verify contractor claims with independent inspections. Trust your instincts if something feels off, and never sign contracts under pressure.

How Baltimore's Harbor Humidity Accelerates Roof Deterioration

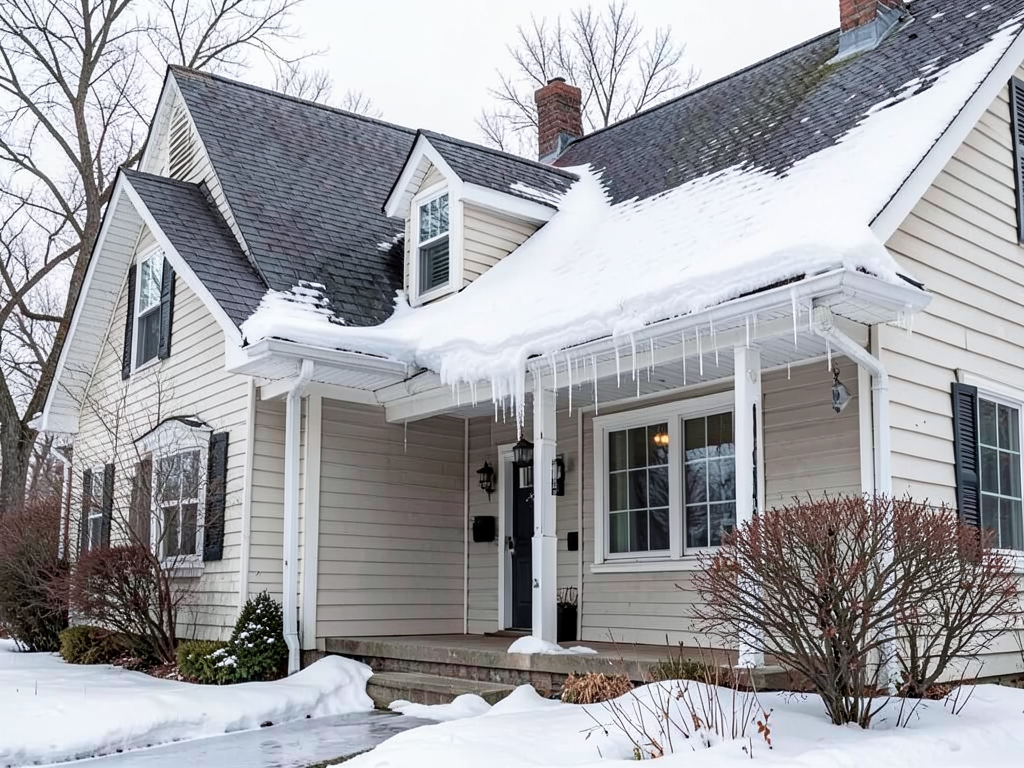
The Chesapeake Bay creates a microclimate that attacks roof systems from above and below. Morning fog deposits salt-laden moisture on shingles, accelerating granule adhesion failure. That same humidity rises through inadequately ventilated attics, condensing on the underside of roof decking and promoting mold growth. Neighborhoods closest to the water, like Fells Point and Locust Point, see roof lifespans reduced by 15 to 20 percent compared to inland areas. A comprehensive roof inspection checklist must account for this moisture exposure, examining both the exterior weather surface and interior attic conditions to catch problems before they compromise the structure.

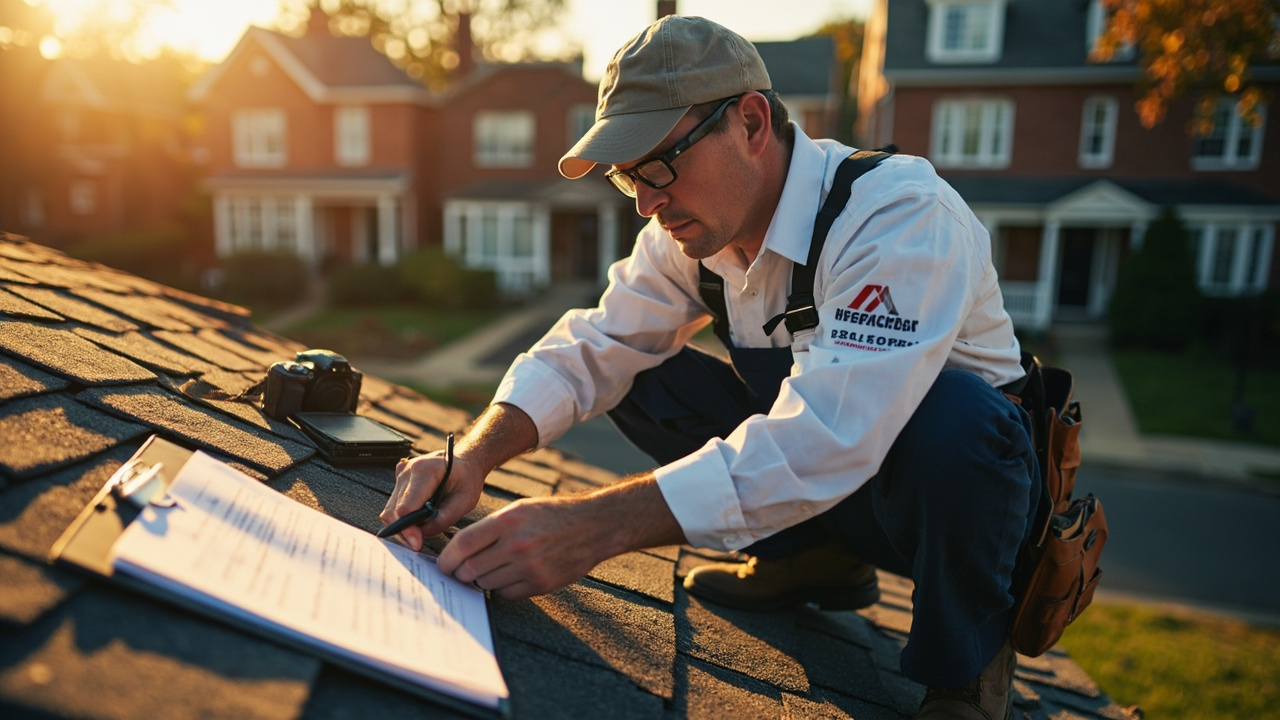
Baltimore County building codes require specific ventilation ratios and underlayment grades because of this coastal moisture exposure. Local contractors understand these requirements and know how to inspect for compliance. A roofing inspection template designed for drier climates will miss the critical ventilation checks and moisture barrier assessments necessary in Maryland. A Plus Roofing Baltimore builds these local factors into every roof check sheet we provide, ensuring your maintenance plan addresses the specific challenges of maintaining a roof system in a high-humidity coastal environment rather than generic problems that may not apply here.

Roofing Services in The Baltimore Area

We are proud to be a locally owned and operated business committed to serving the entire Baltimore community and its surrounding counties. View our office location on the map and see the breadth of our service area. We encourage you to visit our facility or contact us directly to discuss your next roofing project.

Address:
A Plus Roofing Baltimore, 101 N Haven St, Baltimore, MD, 21224

Additional Services We Offer

Our news updates

Latest Articles & News from The Blogs

Finding a Roofer in Westminster Who Actually Knows How to Handle Metal Barn Roofs When your Carroll County barn roof…

Finding a Roofer in Westminster Who Actually Knows How to Handle Metal Barn Roofs

Finding a Roofer in Westminster Who Actually Knows How to Handle Metal Barn Roofs When your Carroll County barn roof…

Upgrading Your Builder-Grade Roof in Severn Before It Starts Leaking

Upgrading Your Builder-Grade Roof in Severn Before It Starts Leaking Your Severn home's builder-grade roof has a ticking clock. Maryland's…

Restoring the Ornamental Roof Details on Victorian Homes in Abell and Waverly

Restoring the Ornamental Roof Details on Victorian Homes in Abell and Waverly Victorian homes in Baltimore's Abell and Waverly neighborhoods…

Contact Us

Stop guessing about your roof's condition. Call A Plus Roofing Baltimore at (443) 455-9099 to receive a detailed roof assessment form and schedule your comprehensive inspection. We will document every problem area and provide a prioritized repair plan.